


Implementing schema markup on your website can significantly boost SEO by giving search engines a better understanding of your content. With the help of Google Tag Manager (GTM), this process becomes far less daunting. Imagine being able to insert a snippet of code that structures your website information without having to sift through the backend lines of code. Yes, it is possible! GTM acts as a middleman – you provide it with the required tags, and it seamlessly integrates them into your site, all without you touching a single line of website code.
Why Use Google Tag Manager for Schema Markup?
Choosing Google Tag Manager for your schema markup endeavors is a wise decision, and here’s why: it offers a centralized, streamlined interface for managing all the scripts and tracking codes, including SEO-enhancing schema markup. This doesn’t just reduce the need for developer intervention each time a script needs to be added or updated; it also minimizes the risk of errors that can occur with manual code edits. By using a Google product like GTM to enhance another Google service—search engine results—you’re creating a synergy that could potentially lead to improved website rankings.
Moreover, if you’re already using GTM for other tracking purposes, integrating schema markup becomes much more efficient. Leverage the familiar interface and functionalities to further improve your website’s discoverability and representation in search results. That’s like hitting two birds with one stone – boosting both your website’s analytics and its SEO presence.
Advantages of Google Tag Manager for Schema Implementation.
Leveraging existing Google Tag Manager Setup
If you’re already using Google Tag Manager for tracking conversions, page views, or other website analytics, leveraging your existing GTM setup for schema markup is a logical next step. This takes advantage of the infrastructure you’ve already established, allowing you to inject structured data more seamlessly. You simply add new tags specifically for schema, which slots into your current workflow. The result? A quick, no-hassle way to give search engines a clearer picture of your site’s content is by defining entities and relationships directly within the GTM dashboard.
Rather than starting from scratch, you manage all tags, including those for SEO, in one place, giving you a bird’s eye view and control over your site’s enhancements. By harnessing your GTM setup, schema markup becomes an integrated part of your overall website strategy, maintaining consistency and efficiency in implementing and managing online marketing and SEO initiatives.
Streamlined Error Fixing and Updates
When you use Google Tag Manager for your schema markup, you benefit from a streamlined process for fixing errors and making updates. GTM provides an intuitive interface where you can make changes and push updates to your website instantly, without the need to edit the site’s source code directly. This is particularly useful when dealing with schema because structured data requires precision; even small mistakes can lead to errors that undermine SEO efforts.
Should you encounter any issues, such as a warning or error in Google’s Structured Data Testing Tool, GTM simplifies the troubleshooting process. You can easily adjust your custom HTML tag within GTM and test it again. This means you spend less time tracking down the source of the problem and more time perfecting your website’s structured data. GTM’s version control feature also allows you to roll back to previous states, providing an additional safety net as you work to maintain flawless schema markup.
Simplified Implementation without Extensive Coding
Implementing schema markup often seems intimidating due to the coding expertise typically required, but Google Tag Manager flips the script on this narrative. It provides a user-friendly way to add schema without extensive coding knowledge. By using GTM’s Custom HTML tag option, you can insert your JSON-LD script, the recommended format by Google for structured data, directly into the tag manager without altering the site’s HTML.
The process is straightforward—paste the JSON-LD code into a new tag and specify when and where it should fire on your site. This simplicity means that even marketers with a basic understanding of HTML can implement schema markup, making it a more accessible endeavor for a broader range of professionals.
Additionally, GTM’s support for dynamic data means that you can create data-driven, automated tags that update themselves based on the content changes on your site. This simplifies the process further by eliminating the need to manually update the schema whenever your content changes—a time-saving benefit for those managing large or frequently updated websites.
Considerations When Using Google Tag Manager for Schema Markup
Technical Expertise: Familiarity with JSON-LD and Variable Setup
While Google Tag Manager simplifies the implementation of schema markup, having a certain level of technical expertise can immensely enhance your ability to use GTM to its full potential. Familiarity with JSON-LD (JavaScript Object Notation for Linked Data), the recommended format for structuring data, is critical. Understanding how to structure JSON-LD scripts and the specific types of data each schema requires is the cornerstone of successful implementation.
In addition to JSON-LD knowledge, getting comfortable with setting up variables in GTM is essential. Variables in GTM can dynamically pull in data from your website and feed it into your JSON-LD scripts, which is particularly useful for e-commerce sites or those with rapidly changing content. For example, you’ll want to know how to craft variables that can pull product prices, stock levels, or ratings to keep your schema data accurate and up-to-date.
Harnessing these technical skills enables you to build robust, compliant schema markup that reflects the complexities of your site’s content and delivers this structured data to search engines effectively. It’s an investment in learning that pays off by making your SEO practices more precise and powerful.
Debugging and Testing: Ensuring Accurate Schema Implementation
Before fully integrating schema markup into your live site, it is crucial to ensure everything works correctly. Google Tag Manager facilitates debugging and testing, helping you avoid the common pitfalls associated with incorrect schema implementations which can harm your website’s SEO rather than help it.
Start by using GTM’s built-in “Preview” mode, which provides a sandbox-like environment where you can see your schema tags in action without affecting the live site. Here, you can verify if the tag fires on the right pages and doesn’t fire where it shouldn’t. This immediate feedback is invaluable in identifying misconfigurations and making necessary adjustments.
Once satisfied in the GTM environment, the next step is to validate the live site’s markup using tools like Google’s Rich Results Test or the Schema Markup Validator. These tools help you see directly how search engines interpret the structured data on your website. They will indicate errors and warnings, guiding you on what needs to be fixed to have a perfectly implemented schema markup.
By rigorously debugging and testing within GTM and these external tools, you ensure the accuracy and effectiveness of your schema markup, giving your website the best chance to stand out in search engine results.
Alternative Approaches: Direct Code Implementation or Plugins
While Google Tag Manager offers many advantages for implementing schema markup, it is not the only path. There are times when alternative approaches may be preferable. Direct code implementation is one such option, where schema markup is manually integrated into a webpage’s source code. This method is often seen as the most stable and reliable, as the schema becomes a permanent fixture in the site’s HTML. It’s particularly advisable for critical schema markup that must be indexed without fail, such as organizational or breadcrumb schema.
Plugins represent another alternative, especially for those using content management systems like WordPress. These can automate much of the schema implementation process, though they often come with limitations regarding customization and may not cover every type of schema needed.
In comparing these methods, remember that direct implementation, while potentially more reliable, requires consistent access to the site’s backend and possibly greater dependence on developer resources. Plugins offer convenience but at the possible cost of flexibility. Google Tag Manager strikes a balance by offering flexibility and convenience, with a slight trade-off in terms of the immediate reliability of direct code implementation.
Ultimately, the choice between GTM, direct implementation, or plugins depends on your specific circumstances, including the complexity of your site, the resources at your disposal, and your comfort level with each approach.
Step-by-Step Guide: Adding Schema Markup Using GTM
Step 1: Creating a Custom HTML Tag with JSON-LD
Creating a Custom HTML tag with JSON-LD in Google Tag Manager is the foundational step to embedding structured data on your website. Start by navigating to the “Tags” section of GTM and selecting the “New” option. Choose “Custom HTML” from the tag configuration choices presented to kick things off. Here, you’ll inject the JSON-LD structured data script that you’ve crafted to describe your webpage content to search engines.
This code should represent the specific type of schema markup you intend to apply, such as Local Business, FAQ, or Product schema. Make sure that your JSON-LD is correctly formatted and includes all required fields as specified by Schema.org and Google’s guidelines. Validate your script with a tool like Google’s Structured Data Testing Tool to ensure there are no errors before embedding it within your new custom HTML tag.
Once your JSON-LD is nestled within the custom HTML tag, you’ve successfully created the vessel that will carry your structured data to the head or body sections of your webpage when triggered. Remember that while this requires some technical knowledge, it’s a simpler process than editing website source code directly, and it can be replicated quickly for different schema types across your site.
Step 2: Defining Variables for Dynamic Data
To make your schema data contextually relevant and adaptable to changes on your site, defining variables for dynamic data in Google Tag Manager is your next essential step. Variables act like smart placeholders that pull live data from your website directly into your tags. When creating a variable, remember that user-defined variables allow for more specificity and control over the data you wish to insert into your schema markup.
Begin by choosing the “Variables” option within your GTM workspace to set up new user-defined variables. Decide on a naming convention that makes these easy to identify and implement in your coding—consider using concise descriptors with clear formatting such as camelCase or PascalCase for readability. This attention to detail will pay dividends when you need to locate and use these variables in the future.
Next, specify the type of variable you need. For instance, “Lookup Table” can be used to match specific page URLs to corresponding business names, phone numbers, or any other piece of unique information relevant to your schema. Assign an “Input Variable,” like {{Page URL}}, and proceed to build your look-up table, carefully mapping each input to its correct output.
Once saved, these variables bring dynamism to your schema, making sure that the right information is displayed on the right pages automatically. This automated finesse ensures consistency and reduces the time and effort needed for manual updates.
Step 3: Setting Triggers for Tag Activation
In Google Tag Manager, triggers are the rules that determine when your tags should be activated and executed. Setting triggers for tag activation is akin to informing GTM under what conditions your schema markup should be injected into your site’s pages.
To set these crucial triggers, look for the “Triggers” section in the GTM workspace and click the “New” button to create a new trigger. For schema markup, you’ll typically select the “Page View” trigger type because schema is often associated with the loading of a specific page.
Within the “Page View” trigger, you have options to specify further: all page views, some page views, or DOM-ready events, among others. If you want to activate the schema on specific pages, like product pages or blog posts, choose “Some Page Views.” Then, define the conditions using filters such as “Page URL contains /product-page” to ensure your schema is only attached where relevant.
Naming your trigger descriptively is also essential for clarity and future management — something straightforward like “Product Page Schema Trigger” will work well.
By thoughtfully setting up these triggers, you ensure that your schema markup is contextually precise, firing only on pages it is designed to describe — a crucial step in maintaining the integrity and relevance of your SEO strategies.
Step 4: Finalizing Schema Tag Configuration
After defining the triggers, the last phase of your schema tag setup involves finalizing and verifying all configurations before deployment. This means double-checking that your Custom HTML tag containing the JSON-LD code is accurate and that all dynamic variables used within the tag are pulling the correct data.
It’s essential to review the trigger conditions to confirm they align with the pages you want the schema to be applied to. If your schema is for product pages, for instance, ensure the trigger is set to fire on URLs that correspond to these pages, but not elsewhere.
Under the “Advanced Settings” of your schema tag, you may also explore options like tag firing priority and tag sequencing if necessary. These advanced configurations can come in handy when multiple tags need to fire in a specific order or when you need to control the precedence of critical tracking or functional scripts on your pages.
Once you’ve reassured that each detail is in place, it’s a good practice to hit the “Preview” button once more to confirm the tag’s behavior in a live environment. Once everything checks out in preview mode, you’re ready to commit your tag adjustments. Save the tag configurations, and it will await your final step: publishing the changes to make your schema tag go live.
Step 5: Testing Your Schema Implementation in GTM
Testing your schema implementation within Google Tag Manager is essential to ensure that your tags are firing correctly and the data is structured as intended. This is where the “Preview” mode in GTM becomes invaluable. To initiate testing, click “Preview” and enter the URL of your site. GTM will launch a new tab where it will display, in real-time, which tags are firing as you navigate through your site.
Once in “Preview” mode, visit the pages where the schema should appear and verify that the schema tags are firing. You should see your schema markup tags listed under the “Tags Fired” section in the GTM debug pane at the bottom of your browser window. Browse different types of pages to confirm that the tag does not fire where it isn’t supposed to.
Additionally, you should manually inspect the page’s source code or DOM (Document Object Model) for the injected JSON-LD. Right-click on the web page, select “View Page Source” or “Inspect” and search for the unique strings from your JSON-LD script to verify it is present.
As you test, document any discrepancies or issues, which will help you refine the tag configurations or troubleshoot as needed. Keep in mind that thorough testing on a variety of pages will strengthen the overall effectiveness of your schema strategy, leading to improved SEO.
Step 6: Validating Schema Markup Using Testing Tools
Once confident that your schema is firing correctly in Google Tag Manager, it’s time to validate that search engines can correctly parse the structured data on your live website. To do this, utilize Google’s Rich Results Test or the Schema Markup Validator. These tools analyze the markup to ensure it complies with schema.org standards and Google’s guidelines for structured data.
Head over to any of these tools and enter the URL of the page you’d like to test. The tool fetches the page and displays all the structured data it contains. If you’ve used GTM for implementation, perform the test on the live site’s URL, as GTM injects the schema script into the page after it has loaded.
These validators provide detailed feedback on your markup. They will let you know if any errors need attention or warnings that could be tweaked for better performance. Carefully review the output, note any issues, and proceed to correct them back in GTM.
Remember, searching for validation errors isn’t a one-time task. As you add new content or change your site’s structure, revalidating your pages ensures continuous compliance and maximizes the effectiveness of your schema in search results.
Best Practices for Schema Markup with Google Tag Manager
Choose the Right Schema Types.
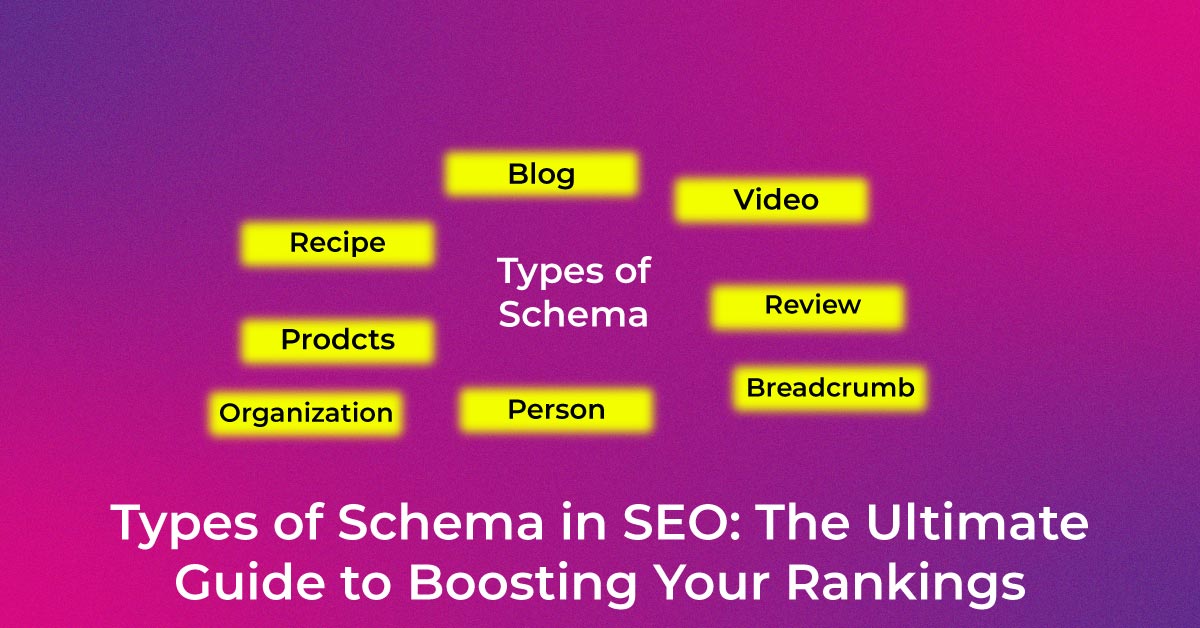
Selecting the appropriate schema types for your content is critical to maximizing the impact of structured data on search engine optimization. The choice of schema should align with the nature of your website and the information you wish to highlight. For a local business, the Organization or Local Business schema provides valuable details like name, address, and opening hours, while an e-commerce site benefits from a Product schema that showcases ratings, price, and stock level.
When deciding which schema types to implement, consider the main actions you want users to take or the information you want to stand out in search engines. A recipe blog would benefit from Recipe schema, whereas a job portal might opt for JobPosting schema. Using more specific and detailed schema types can lead to more informative search engine results and better click-through rates.
Ensure you’re up-to-date with the latest schema types and Google’s supported features by consulting resources like Schema.org or Google’s Search Gallery. This will help you accurately reflect your website’s offerings and provide search engine users with the most relevant and rich results.
Use a Schema Markup Validator
After crafting and implementing your schema, it is imperative to use a schema markup validator to ensure your structured data is error-free and comprehensible by search engines. The Schema Markup Validator, formerly known as Google’s Structured Data Testing Tool, is an indispensable resource. It provides a detailed assessment of your markup, pinpointing any errors or warnings that may affect how search engines interpret your data.
To use the validator, simply enter the URL of the page you want to check or paste the HTML code directly into the tool. It will then scan for all forms of structured data, including microdata, JSON-LD, and RDFa. The validator lists out all detected schemas, summarizing their type and status. You’ll be able to spot issues at a glance and receive suggestions for how to resolve them.
Regularly submitting your pages to a schema markup validator forms a best practice in your SEO maintenance routine. Keeping your markup clean not only aids in displaying rich results but also ensures a better understanding of your website’s content by search engines.
Keep Your Schema Markup Up to Date
Keep your schema markup up-to-date as your website changes. Whether you’re adding new products, updating business info, or posting fresh content, your structured data should match these updates. Schedule regular reviews, ideally with each website update or at least quarterly, to remove outdated data and add any new schema types.
Use Google Tag Manager to automate updates, reducing manual work and ensuring your schema stays accurate. This proactive approach helps maintain SEO rankings and boosts your visibility in rich search results.
![]()